Video Assessments with Resimion
Video assessments provide a key tool in the robust assessment toolbox, and fortunately Resimion makes it very easy for both students to upload video with optional validation and manage the process from marking through to feedback. With Resimion’s video submission feature, students can upload videos and associated files up to 10 gigabytes in size or provide a link to an external video they have uploaded (such as YouTube, Panopto or Vimeo) if you allow.
This guide explains how to use Resimion to allow students to upload videos, automatically validate the length and other attributes of the video, and also explains the student experience.
Resimion video submission functionality is available to organisations with 50 or more licensed slots at the Assess or Embed tier, or an unlimited license.
Why use Resimion?
- Resimion handle student technical problems from login to upload directly with the students
- Batches of files can be uploaded and grouped together by students – for example supporting files with the video
- Resimion validates the upload meets required parameters – type of video, length, size and files present
- LiveChat during the working week, and email support for both you and the students during the upload process
- Integrated feedback means no more word documents to fill out and download or upload
- Everything is audited, timestamped and secured
Assessment Setup
There are two ways to setup a video-based assessment in Resimion:
- Anonymously if you just want to use Resimion to validate the videos and store them and have a 3rd party system you’d like students to submit upload details to, or
- Signed in to use the feedback functionality, peer reminders to drive cohort engagement and track student assessments (for example, uploading multiple files and aggregating them together)
When you create the submission, you will be provided with a 6-digit code. For anonymous submissions, your students will need this code. For signed-in assessments, students will need either the code or you can allocate the the submission in assessment manager and let Resimion manage notifications.
To create a new submission in Resimion, do the following:
- Login to Resimion Web Manager (https://web.resimion.com)
- Locate the Scenario Space you wish to create the assessment within
- Note: if you are using allocations, make sure you have previously added your learners so Resimion can manage the invitation process.
- Click ‘New Submission’, and specify the parameters. Available limitations include:
- The minimum and maximum length of the video you wish students to be able to upload
- The minimum and maximum file sizes
- The type of files that can be uploaded – Video (MP4, MOV, WEBM), Audio, Image or other files (DOC, XLS, PDF, PPTX, ZIP, etc).
- Require an audio and video stream
- If you wish to specify rules or notes displayed to the student before they upload, type them in the description box. Students will have to confirm they accept your instructions before they can upload.
- Click ‘Activate’ to open the submission, and Resimion will generate you a 6-digit code which you can hand to students.
- If you wish to schedule the Open or Close of this submission, you can control scheduling by clicking ‘Schedule’.
- If you wish to allocate this submission to students, click the ‘Allocate’ button and select the cohort of learners to allocate this submission to. Resimion will send those learners a notification and remind them to upload periodically.
Student Experience
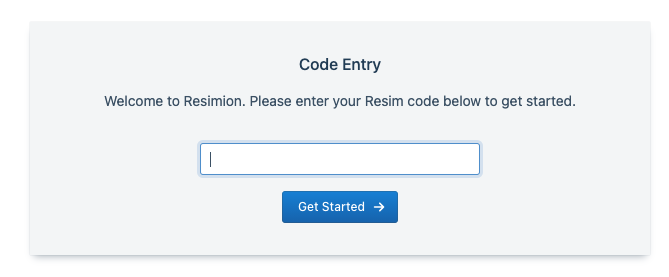
When students visit Resimion (via https://go.resimion.com), they will either enter the 6-digit code into the code entry dialog, or will see allocations.
Students will then optionally be presented with any information or rules to accept before uploading.
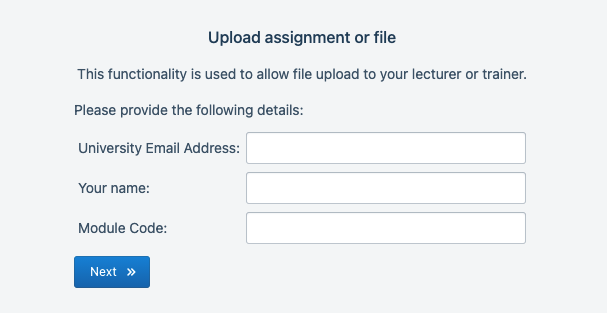
Depending on your settings in the submission, you can collect different information from students, which may be particularly important if you are using anonymous mode. In signed-in mode, you do not need to collect any further information as the system has already got all data required to identify the student for marking.
Students can then proceed to select files for upload, upload them, and receive a confirmation email (if using signed-in mode) once validation is completed.
Providing Feedback
You can access submissions at any time either during or after your submission has closed. You can export a list of uploads with URL and student number/email address, or you can view the videos and associated files within the Resimion marking centre.
If you wish to use the Resimion marking centre to manage the process, click ‘Marking’ within your submission. The marking centre allows you to provide feedback whilst watching the video(s), time-stamping the feedback to points in the video if desired. Once complete, you can click the ‘Next’ button to look at the next student’s submission, or ‘Next and Release’ to email the student’s feedback to them. You can also provide one or more grades to the student.
You can optionally allocate students to others to mark and track in the marking centre. They must be invited to the scenario space to be able to see the submissions.
Once all feedback is completed, you can then proceed to release all results and export grades to a 3rd party tool (such as Blackboard). Resimion will email feedback to the students that you have provided. Note that the marker of the assessment or submission remains unknown to the student.