Inviting Students & Learners to Resimion
The Resimion experience is better when learners login. You can allocate scenarios to learners removing the need to give out codes, restrict who can run your scenarios, and how many times, and also use the assessment and marking functionality. Learners who are logged in can also review existing scenario results and receive emails with feedback and scores.
Inviting Learners to Resimion
Resimion only keeps two key bits of data for learners – an email address and a unique identifier (such as a student number). The email address is used to contact the learner with results, invites or similar when you allocate, and the student number or identifier is used to help you match students up (for example when you are doing an export to blackboard).
You can invite learners one-by-one, or bulk import – it’s your choice.
When learners are invited to Resimion, Resimion sends them an invitation email and then encourages them to take a practice scenario (brewing a hot beverage) to get familiar with the Resimion system. You can track all of this from the Assessment Dashboard.
Requirements
To invite users to Resimion, you must have a paid assessment space, either at the Assess or Embed level. You cannot invite students to your personal space or an Engage space.
You should also prepare learners in advance by warning them they will get an invite from a system called Resimion, and explain to them what it is used for. We do that as part of the invite, but the better you can set expectations, the more likely it is learners signup quickly.
Lastly, if you wish to bulk import learners, you will need to prepare a text file full of learners in the following format:
<email>,<uniqueid>
<email>,<uniqueid>
Where one learner’s email is on each line, followed by a comma, followed by a unique ID. If you do not wish to upload any unique ID, leave this part blank.
Tagging
You have the option to use tagging as part of the import process. Tagging allows you to group related learners (for example those in different module groups, teams or similar), or those with accessibility or inclusivity needs (extra time, etc) together which is useful when allocating scenarios.
Importing
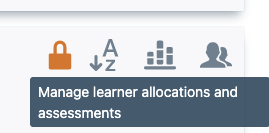
In your scenario space, click the graph/chart icon to load the assessment dashboard.
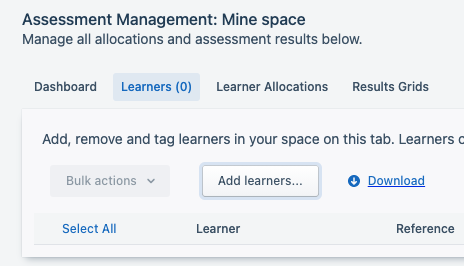
Once in the assessment dashboard, click the ‘Learners’ tab and ‘Add Learners’.
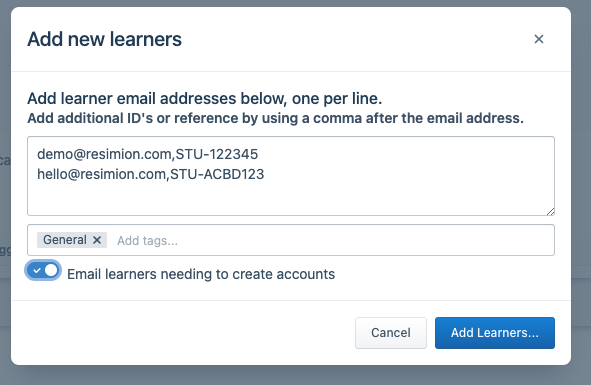
To run the import, copy and paste your learners in the above format into the box as shown. Enable sending email invitations, and click ‘Add Learners…’.
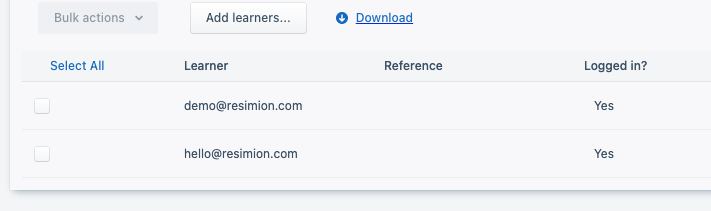
The process will then import all learners and email them. As learners are added, you’ll notice they have logged in:
You can now proceed to allocate learners. The system will remind learners invite by not yet signed up on a weekly basis.