Resimion Crime Scene Toolkit
This toolkit contains everything you need to get going with a basic Crime Scene in Resimion, run by a trainee CSI. You can use your own images or the example ones, and you can modify the examples as much as you like.
We have a walkthrough video here, and examples for you to use to create your own scenes here.
If you’d like a copy of the completed examples put in your space, please contact us at hello@resimion.com.
Before you Start
Before you get started, it’s important to make sure you know what the learning objectives for your scenario are going to be. Our example scene consists of a 6 primary tasks:
- First Officer Arriving Interview
- Risk Assessment
- Initial Observations
- Scene Sketch & Video Upload
- Packaging 3 Items of Evidence
- Scene Report
If you do not have an Embed license on your scenario space, some of these features will not be available to you.
Additionally, it’s important to understand the areas of Resimion’s interface. Read this to find out more.
Lastly, you’ll need a Resimion account! Don’t have one? Don’t worry – you can sign up for one here.
Setting the Problem
Every scenario in Resimion needs an overview of what you expect from the student. It usually sets the scene, identifies the learning objective, and sets the expectation of what the student is about to perform. See Scenario Overview for information on setting up the scenario.
Setting up Scoring
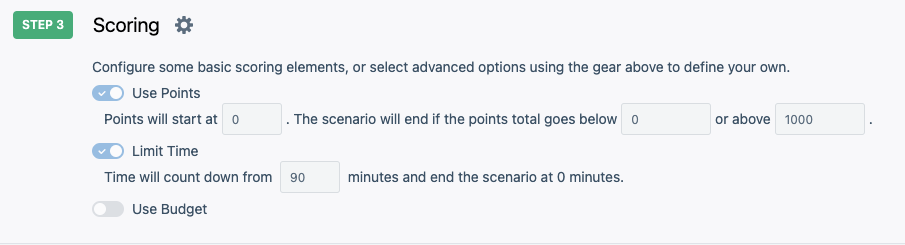
Scoring – or setting up metrics/measures – adds a fun but serious mechanism to the scenarios to allow for assessment, feedback and complexity. Every scenario comes with Points, Budgets and Time setup, with Points and Time enabled. To get going quickly, set the maximum points and amount of time the scenario should run for (in minutes).
For more complex scoring setup, read Advanced Scoring, including an example on how to introduce a fun ‘CSI reputation’ score to the scenario as an example!
Adding Tasks/Stages
Tasks and content are the main part of the scenario, and potentially the hardest to add. See our guide on adding tasks/stages, and our guide on adding content.
Configuring the Path & Tasks
You need to configure the tasks, conditions and transitions between tasks. To do this, see creating a path.
Testing your scenario
Testing your scenario requires that you have completed all steps. If you have, click ‘Activate’ to open the scenario for testing. Visit https://go.resimion.com to test your scenario, and use the scenario code generated when you clicked ‘Activate’.
Once a scenario is activated you can’t edit the scenario any further until you have Reset the scenario.
Invite & Allocate to Learners
Lastly, you need to invite learners to Resimion, and allocate them the scenario. Click each to find out more about the process.
Checklist
Here is a handy checklist to make sure, when setting up your scene, you have included all the basic features.